
Bottlebrush (Callistemon) with gel plate printing, machine embroidery and fmq
Australia is a country rich in both flora and fauna. I wanted to celebrate this and make a wallhanging for my husband’s birthday.
Firstly, I started with a piece of plain white homespun and thought about the light and shadows. I mixed watercolour paint with textile medium and painted diagonal bars of slanting light ad darker areas of foliage and tree trunk. Then I let it dry, heat set it and washed it.

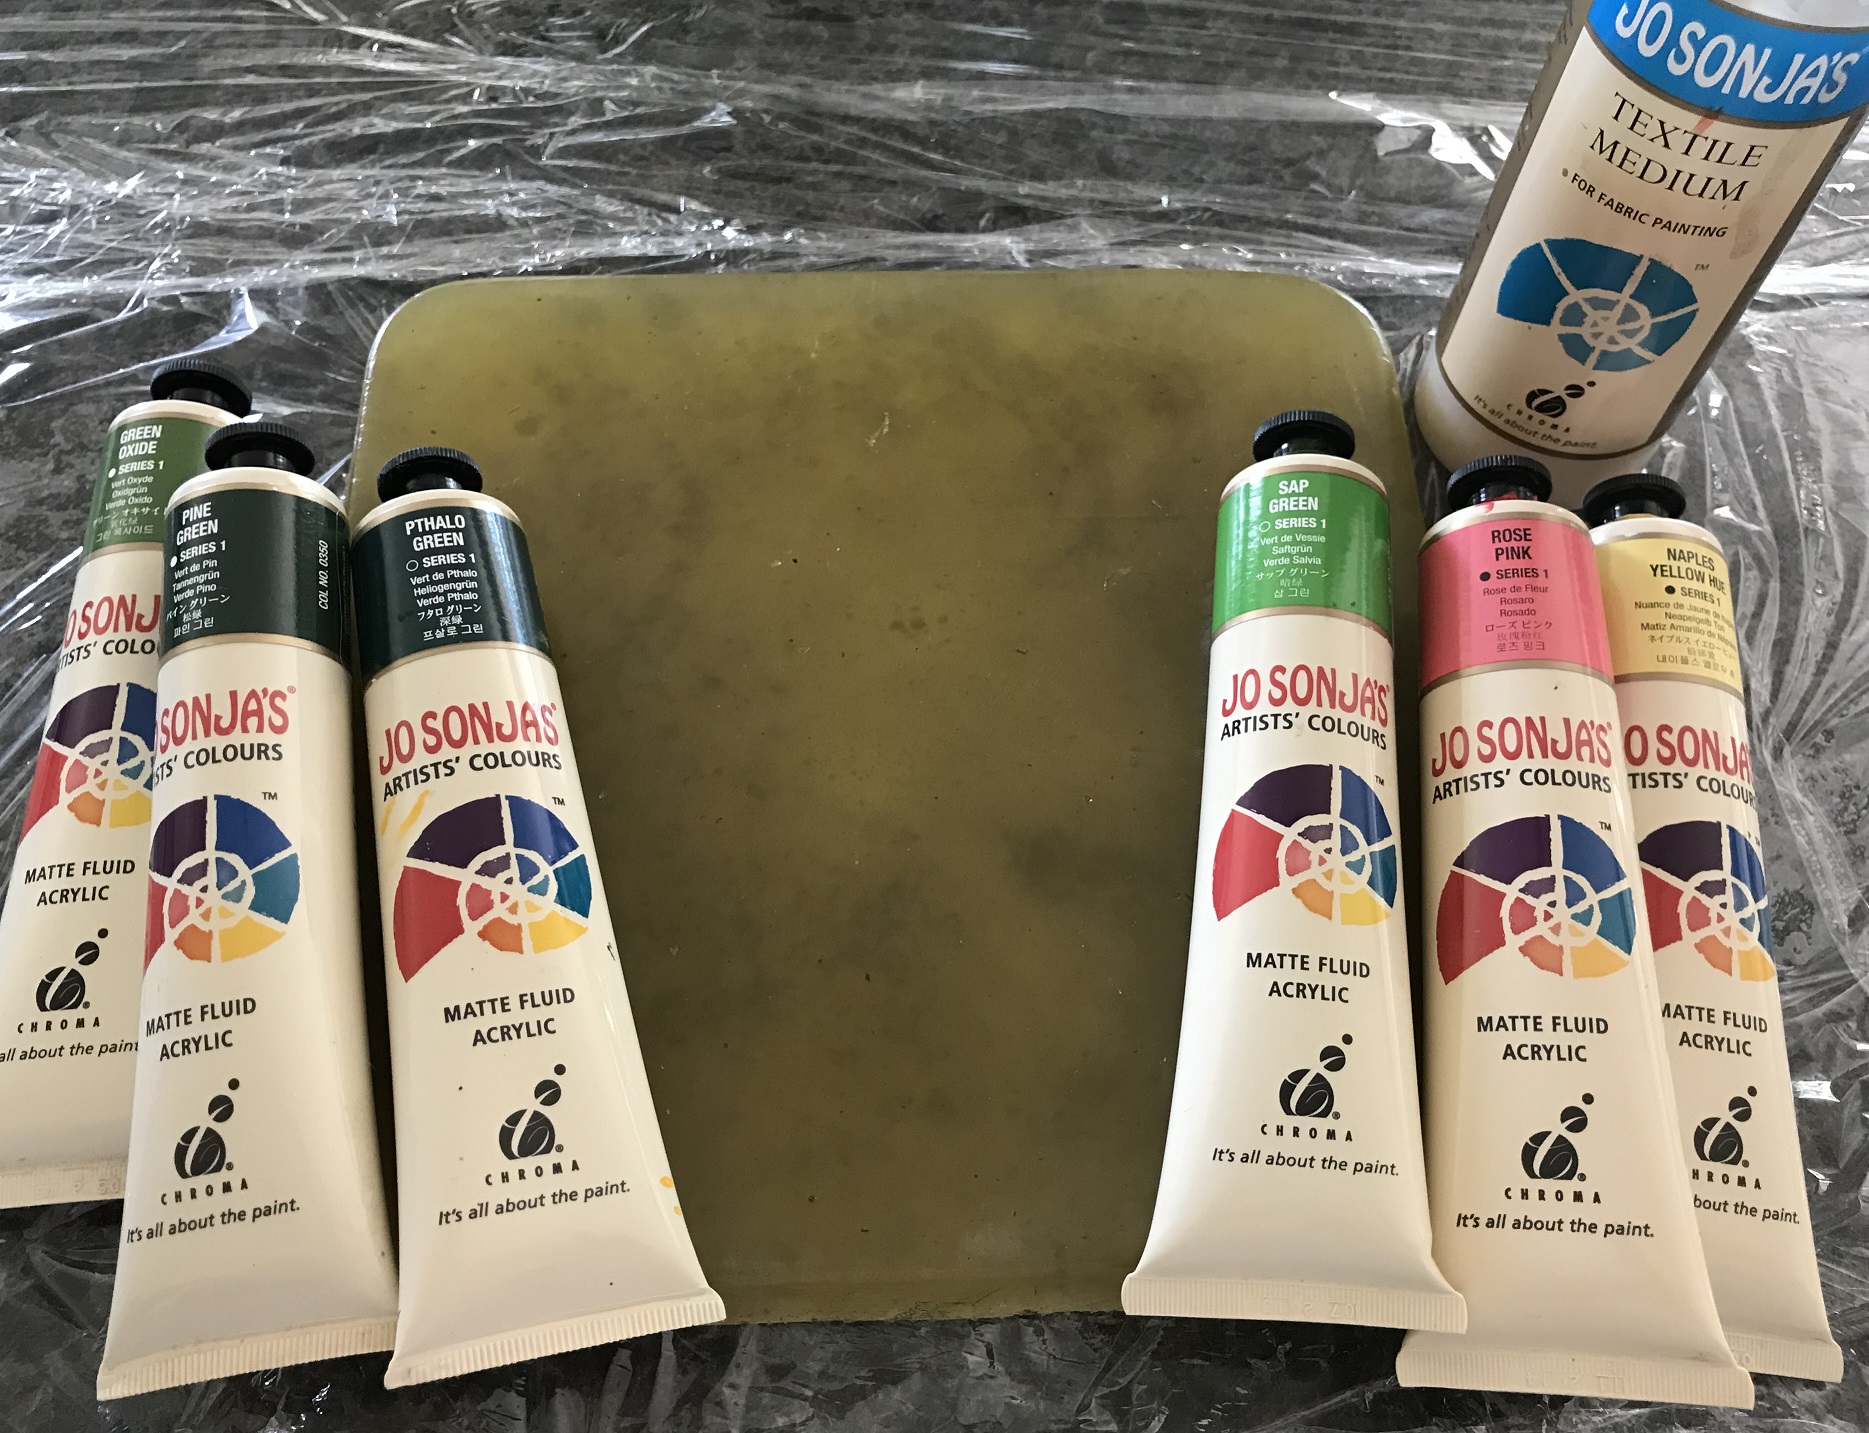
Secondly, I tried painting leaves. Total disaster, they looked like rubbish. My daughter suggested gel plate printing and I thought I’d give it a go. This required a recipe: 100 g gelatine, 399 mL glycerol and 300 mL water. The gelatine was easy to get from the grocery store. The glycerol I got from the chemist. I then mixed up the gelatine and the water, added the glycerol and heated.
So far, so simple.
I poured the mixture into a sponge roll pan and let it set in the fridge overnight. (I was going big). Now, when I turned the gel plate out in the morning, it looked terrific to me, but my daughter insisted we remove any fine marks due to scratches in the cake tin. So, out with the hairdryer and we melted down the top layer and let it reset.
Gel plate
I used acrylic paints with textile medium.
The next day I zipped around the garden and picked any foliage I thought would make a good print and set to work. I rescued an unused paint roller from the shed, covered my rolling pin in cling wrap, and unfolded a plastic folding table….. to work.
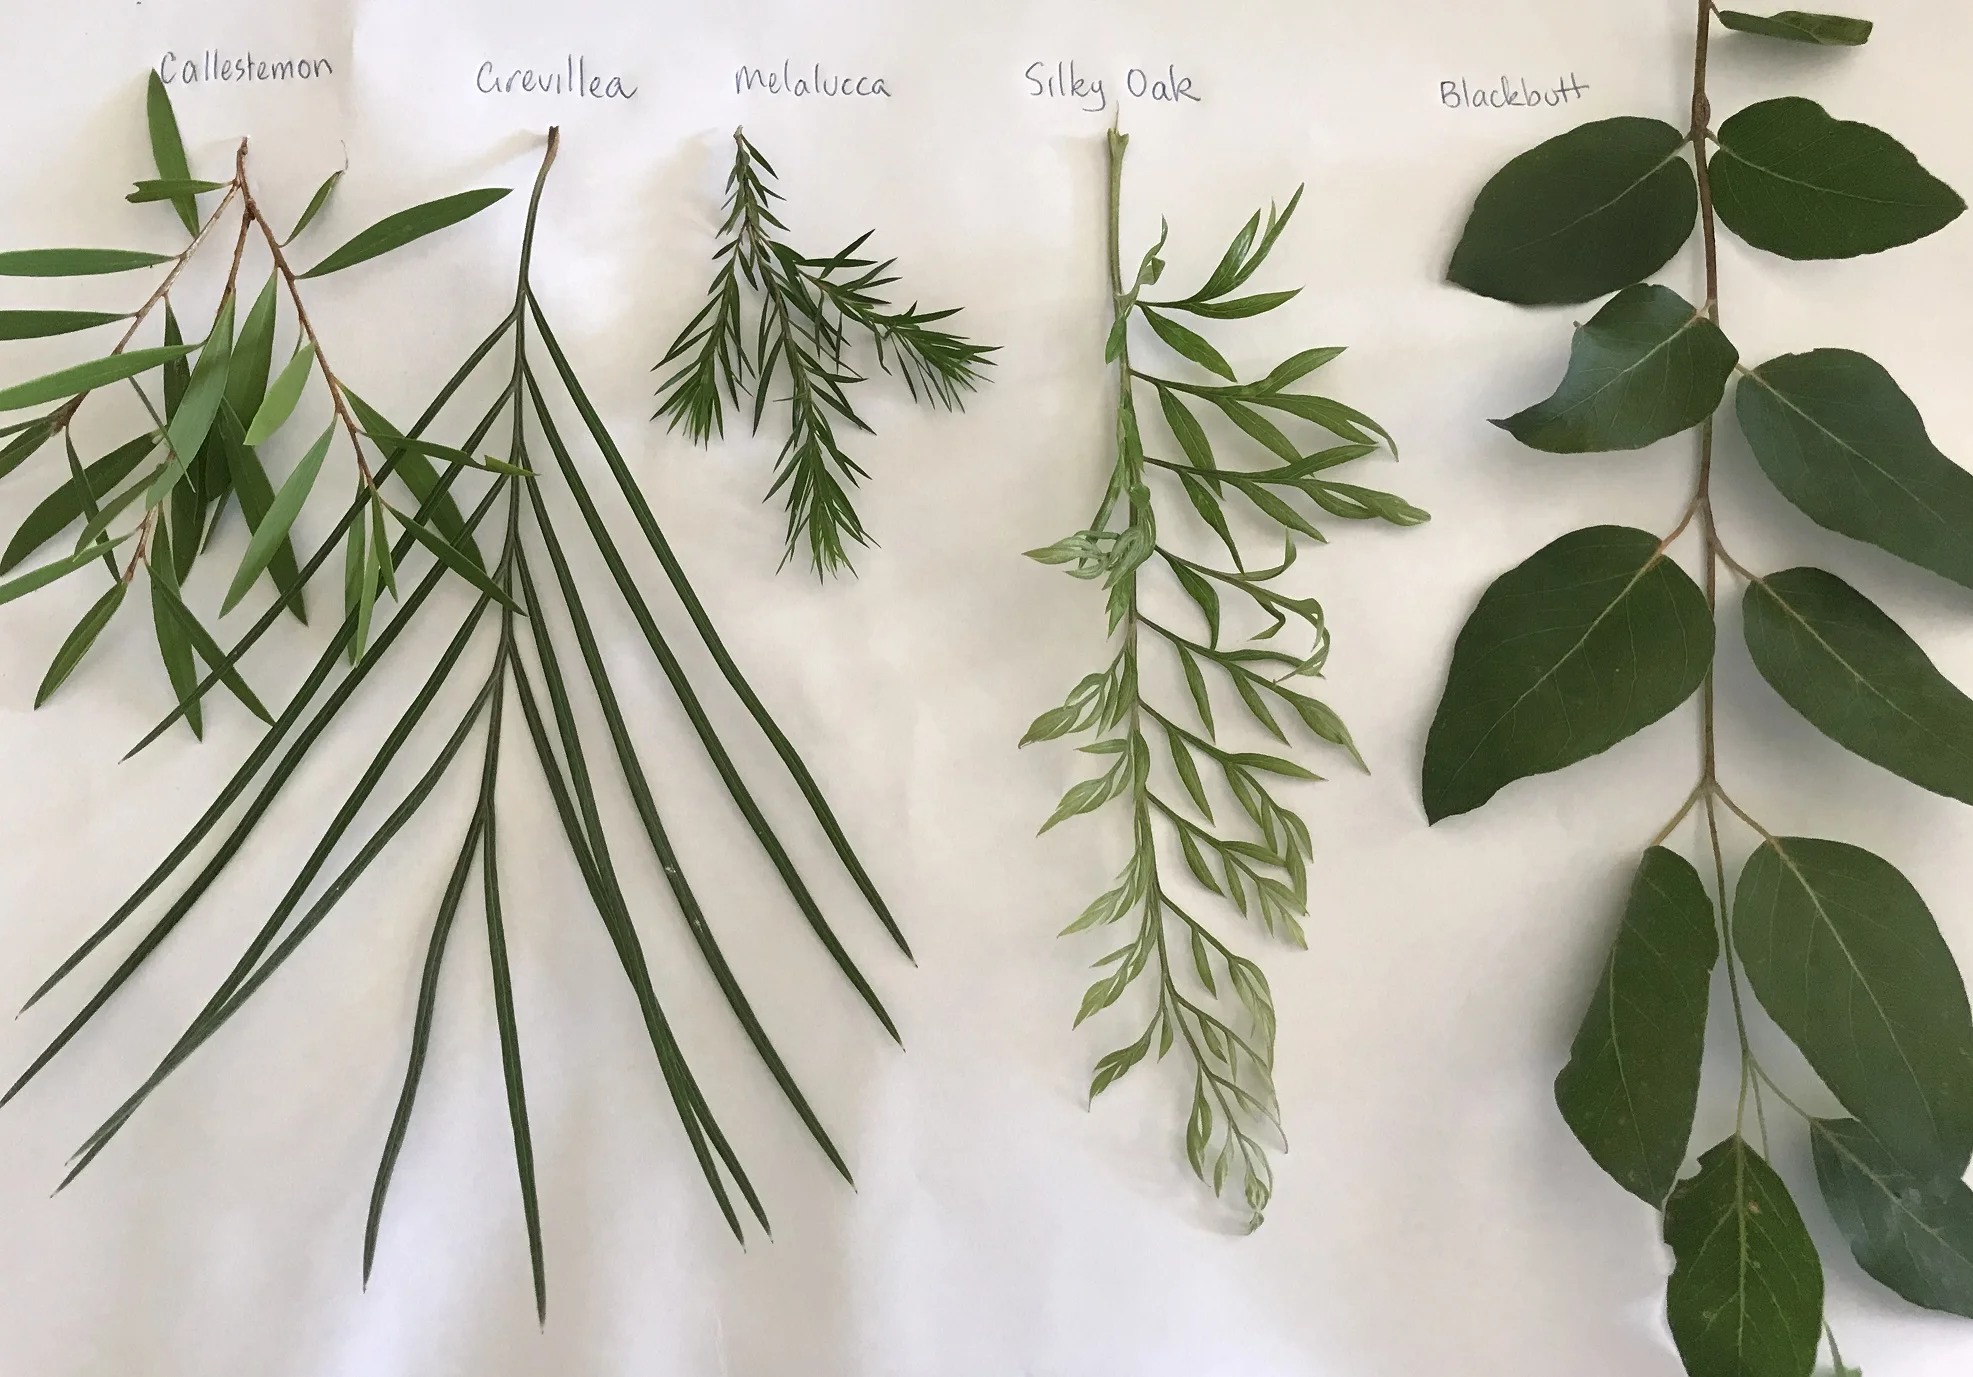
Callistemon, Grevillea, Melalucca, Silky Oak, Blackbutt
To make the prints I mixed green yellow and a bit of pink acrylic paint with textile medium to make a murky foliage colour. Eucalypts generally have a very subdued palate, from greyish blue to greyish green and some darker greens, still with a lot of grey in the tone. OK, that sounds like I had a plan. I so didn’t. I just didn’t want to buy any more paint. The table made an excellent mixing pallette.
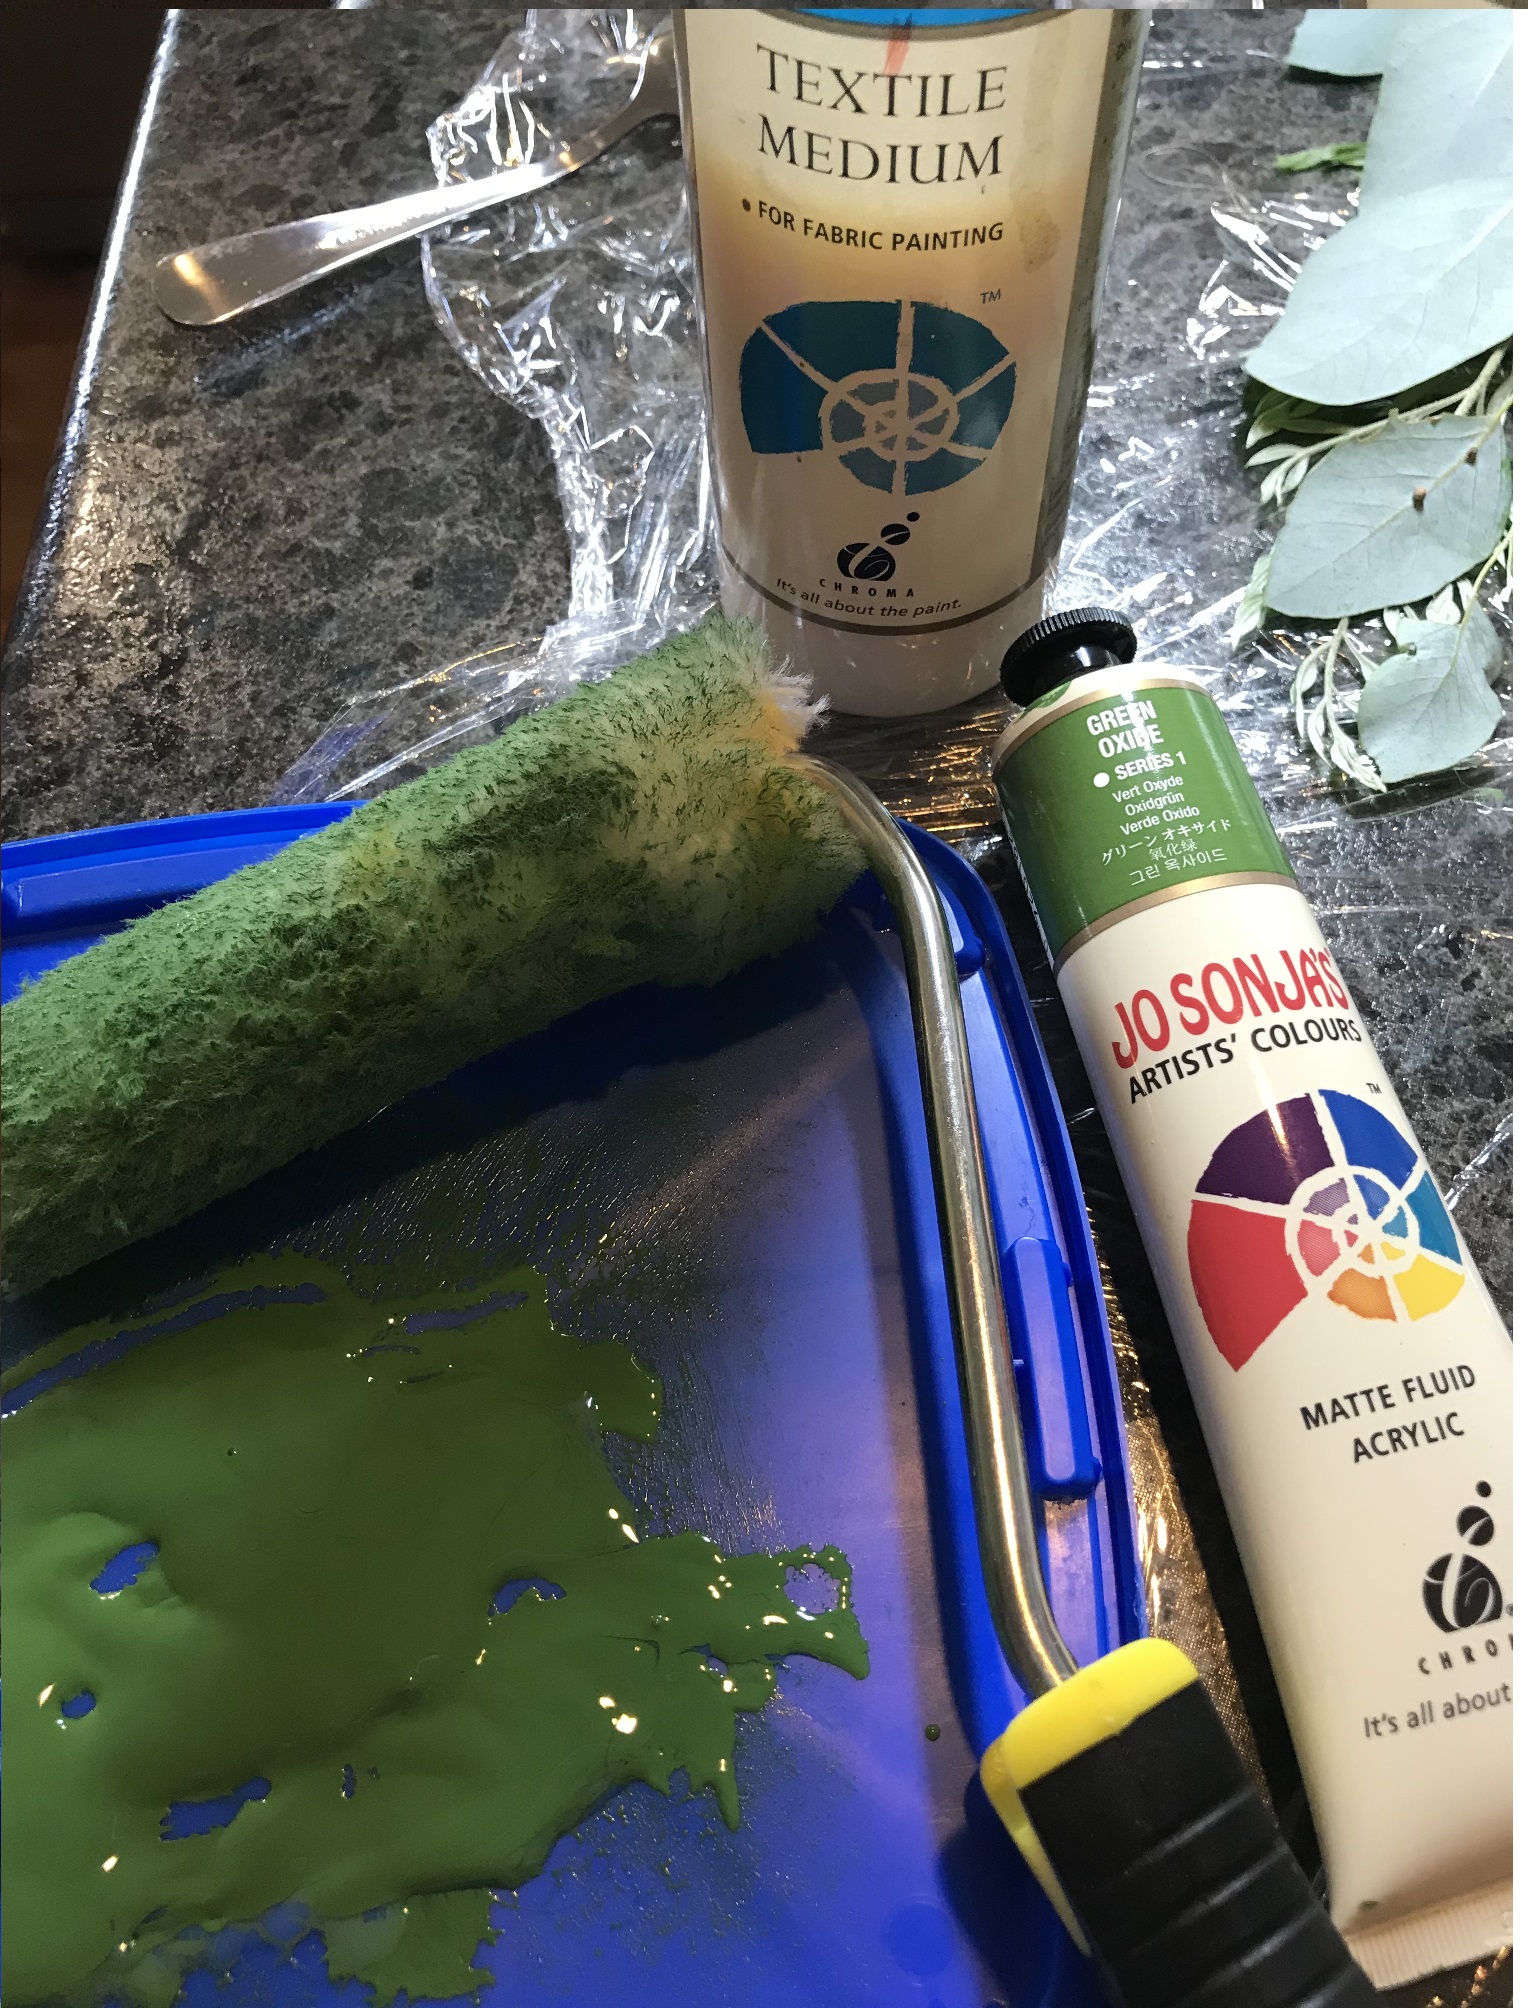
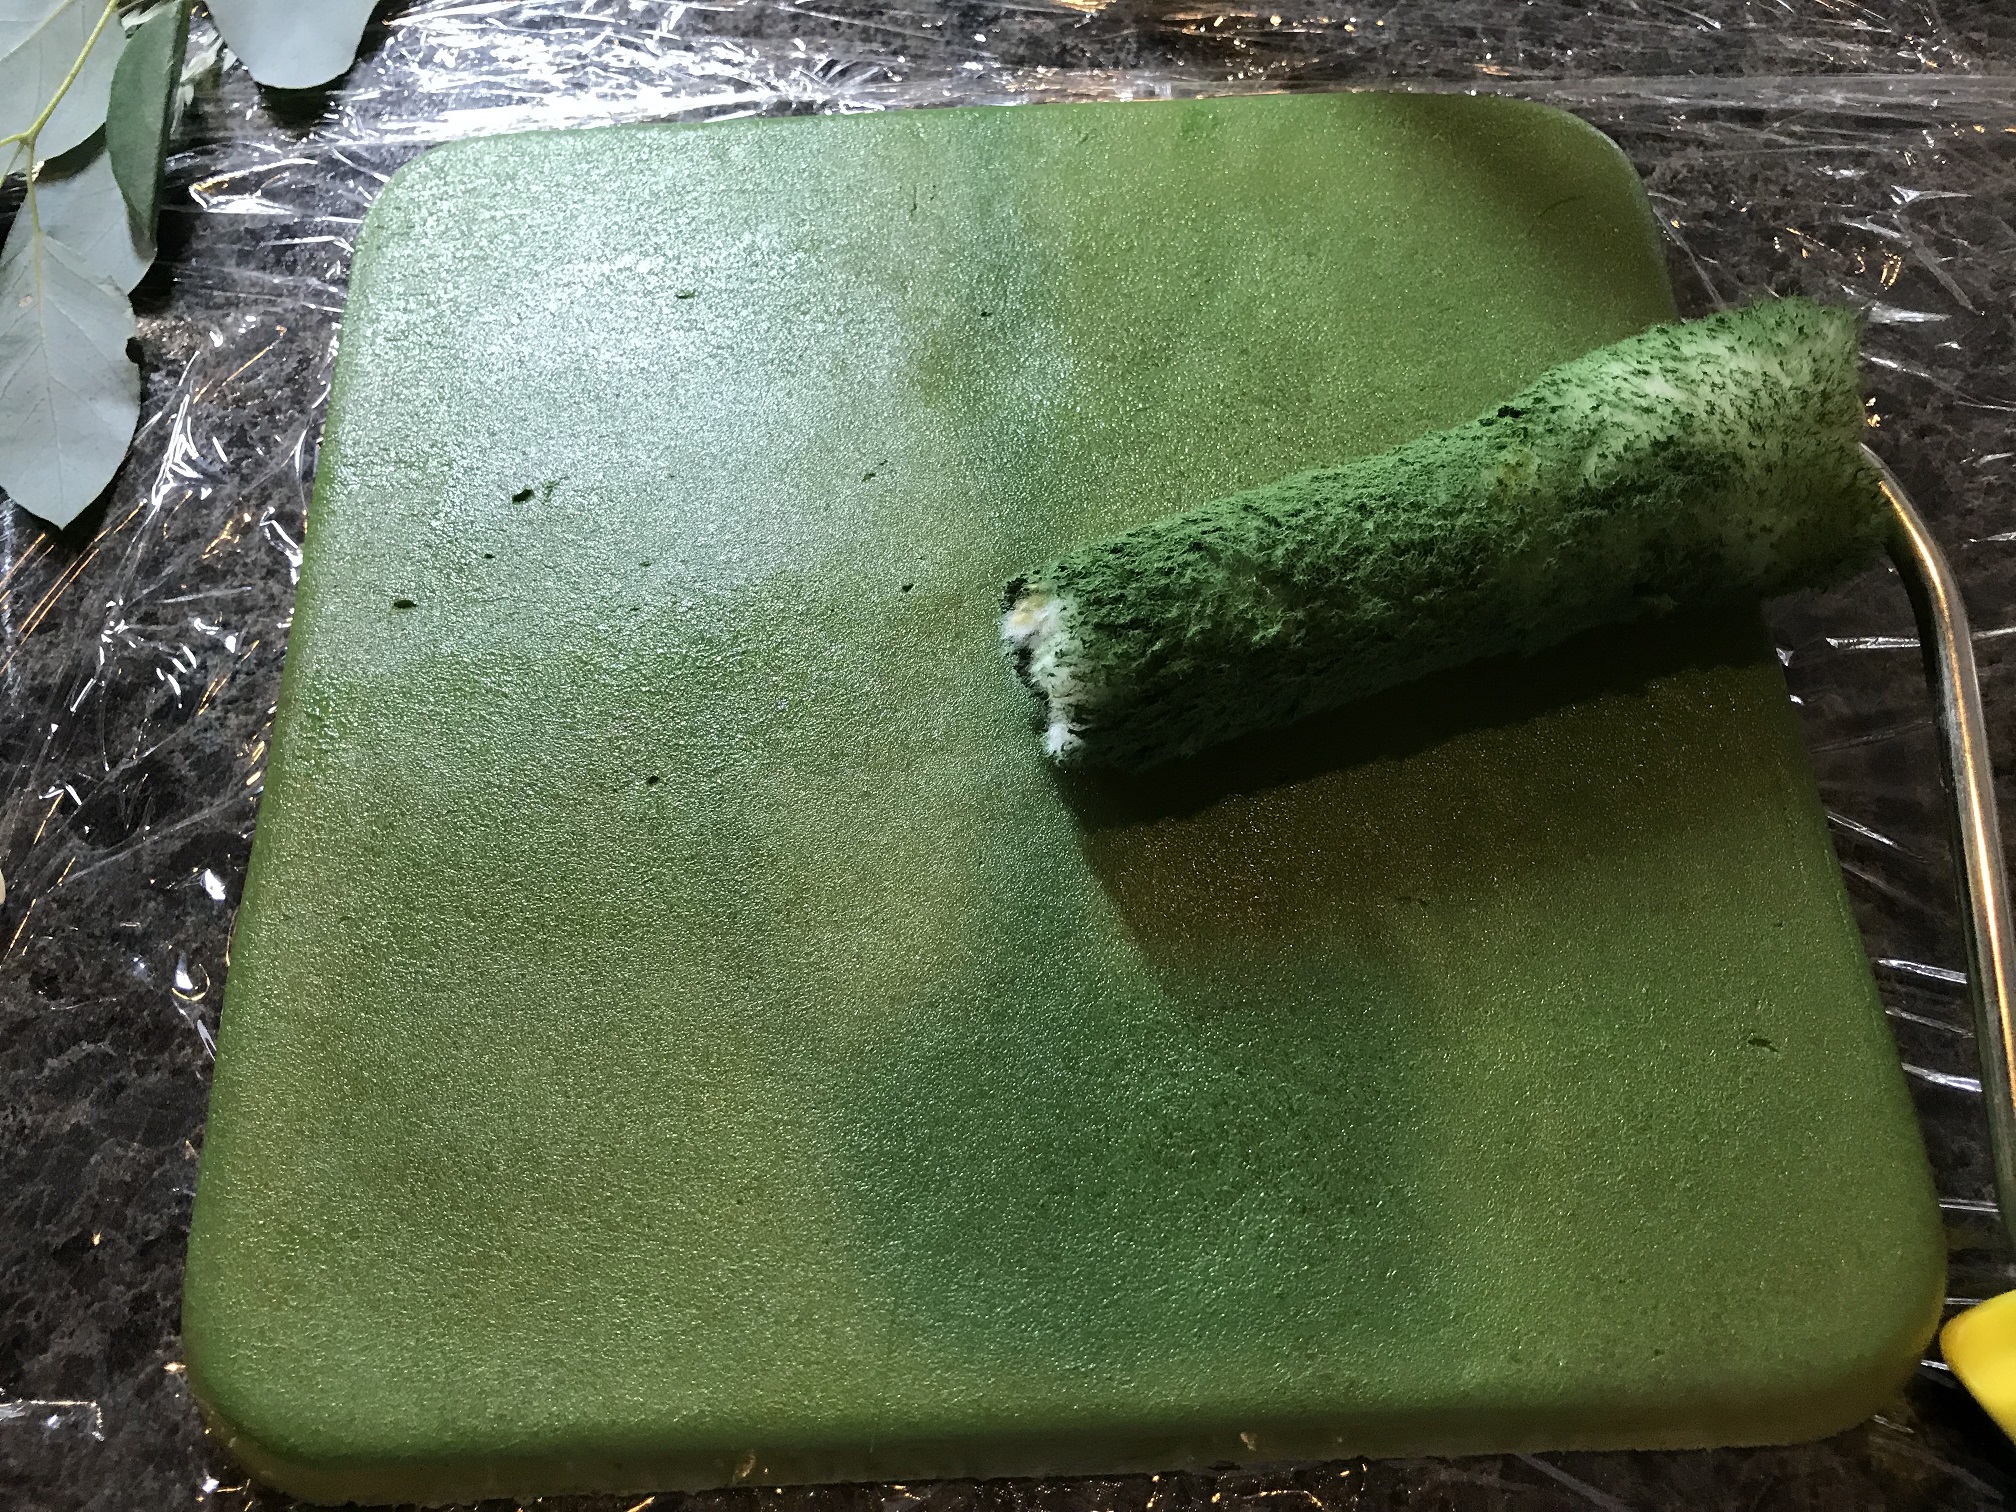
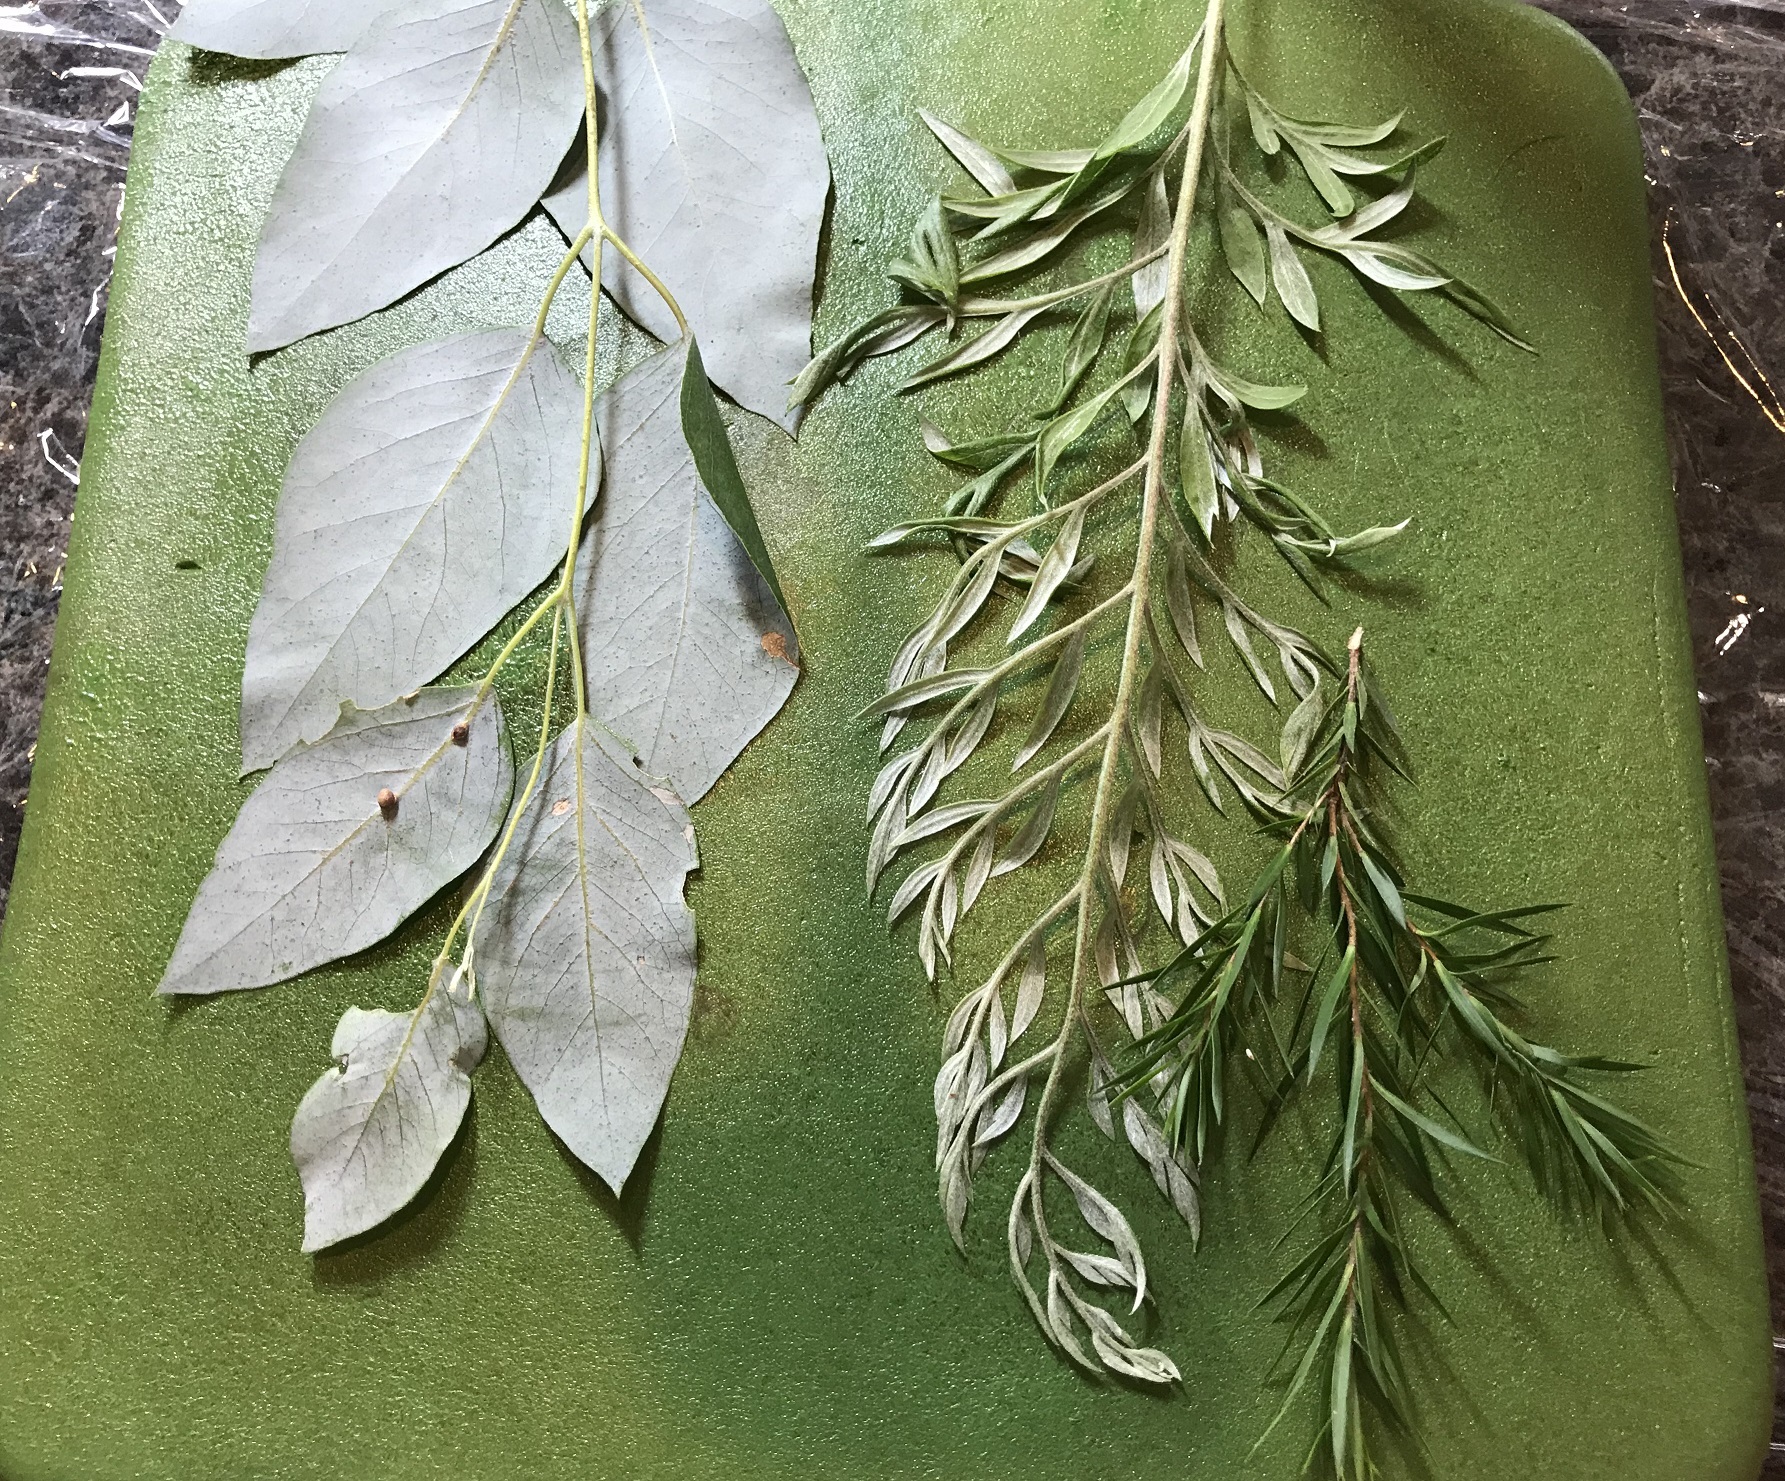
I painted the gel plate with the paint roller. I placed the leaves on the gel plate. I then placed scrap fabric on the top and used the rolling pin and my fingers to transfer the paint to the cloth. Note that in this print a negative print is being achieved. This is because the paint is on the gel plate under the leaves. So the leaf shapes stay white and the background gets coloured.

Paint transferred from the gel plate. Leaves are on the gel plate so no paint is transferred from under the leaves.

Once I’d removed at least 90% of the paint from the background, I was ready to print the leaf shapes onto my prepared fabric. I carefully peeled the leaves off, leaving the impressions of the leaves on the gel plate. Then when I put my fabric onto the gel plate, I got a positive image of leaves on the fabric. If all the paint did not transfer, I moved the fabric and made a second ghostly print.


When I’d had a lot of fun and made a lot of prints, I dried the fabric, heat set it and left it for 24 hours. Then I washed it.
So far, so good, no paint was washing out.
In order to store my gel plate, I reheated it and set it in a smaller block, wrapped it in cling wrap and put it in the fridge. And, ok, yes, I admit it, I had to buy more paint.
Now, I wanted to embroider callistemon or bottle brush flowers. They come in a lot of colours and I really like the pale orange / peachy coloured flowers. But I chose to do the red flowers to get nice contrast with the dull green background. Now, the things you don’t notice about bottle brush: they grow in little clumps around the stem; they aren’t the end of the branch, the branch may continue with extra leaves; each little clump of red is based in a yellow cup which turns into a nut when the flower dies; each little needle of the flower ends in a bit of yellow pollen; they don’t all hang down …. some are end on and you see the circle of flower petals with the leaves bursting forth from the centre.

Callistemon
I had a few practice tries, embroidering in the hoop with washaway and tearaway stabiliser (both) as I was adding very heavy thread free motion embroidery. I tried embroidering on to chiffon with the intention of cutting the shapes out and then sewing them onto the background, because I thought this might help deal with any issues of puckering, but eventually I decided it was easier to just sew the flowers straight to the background.
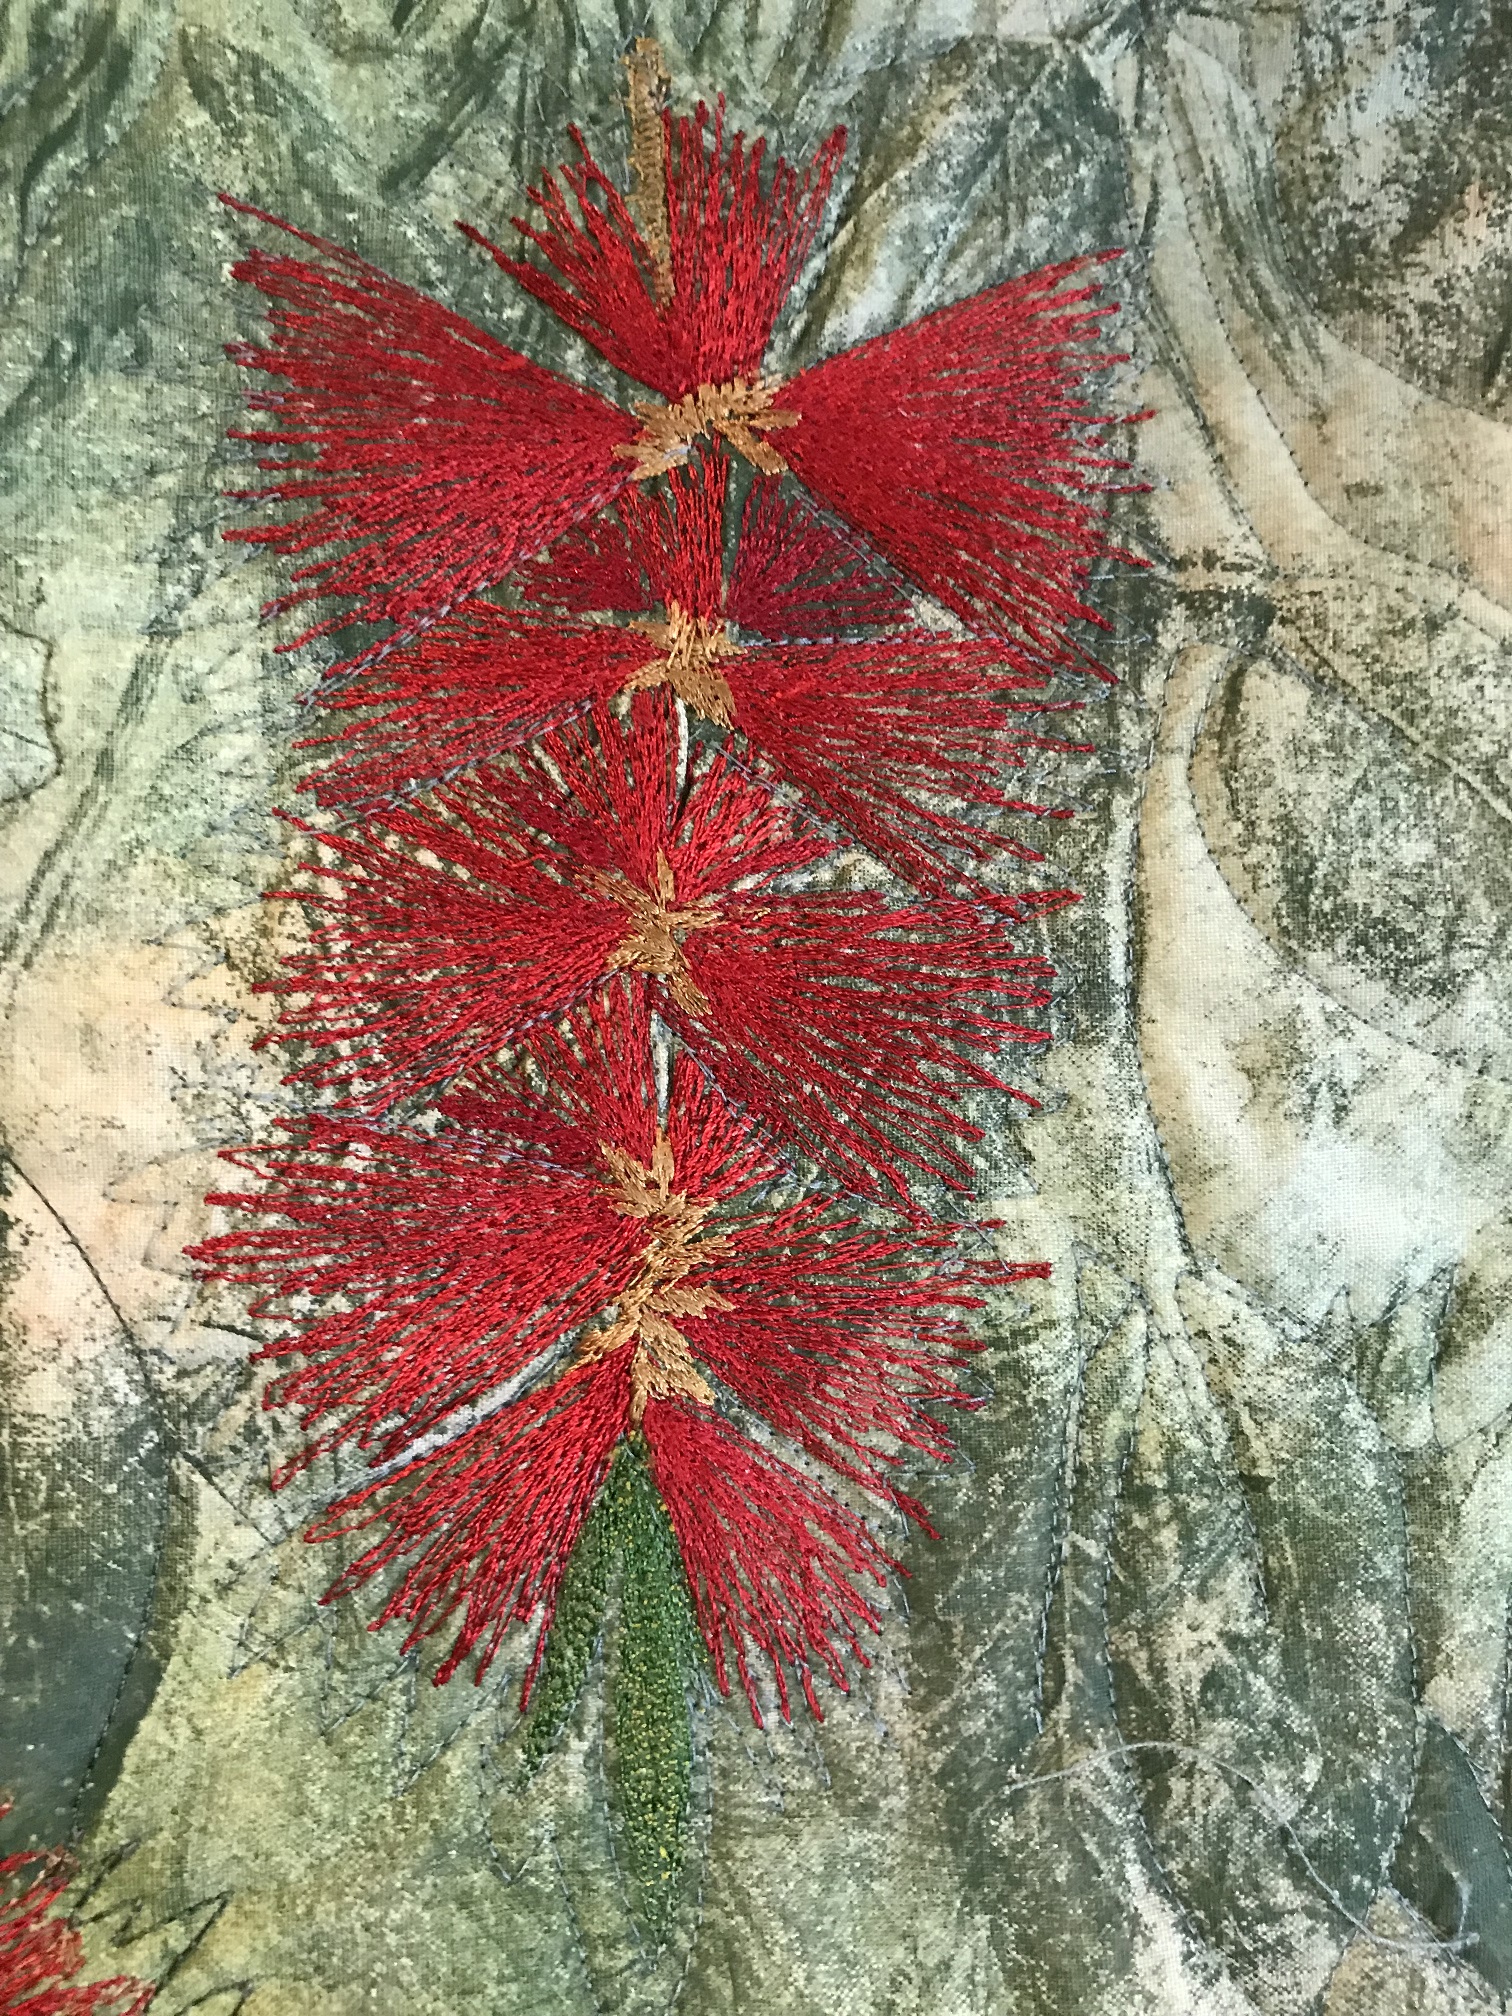

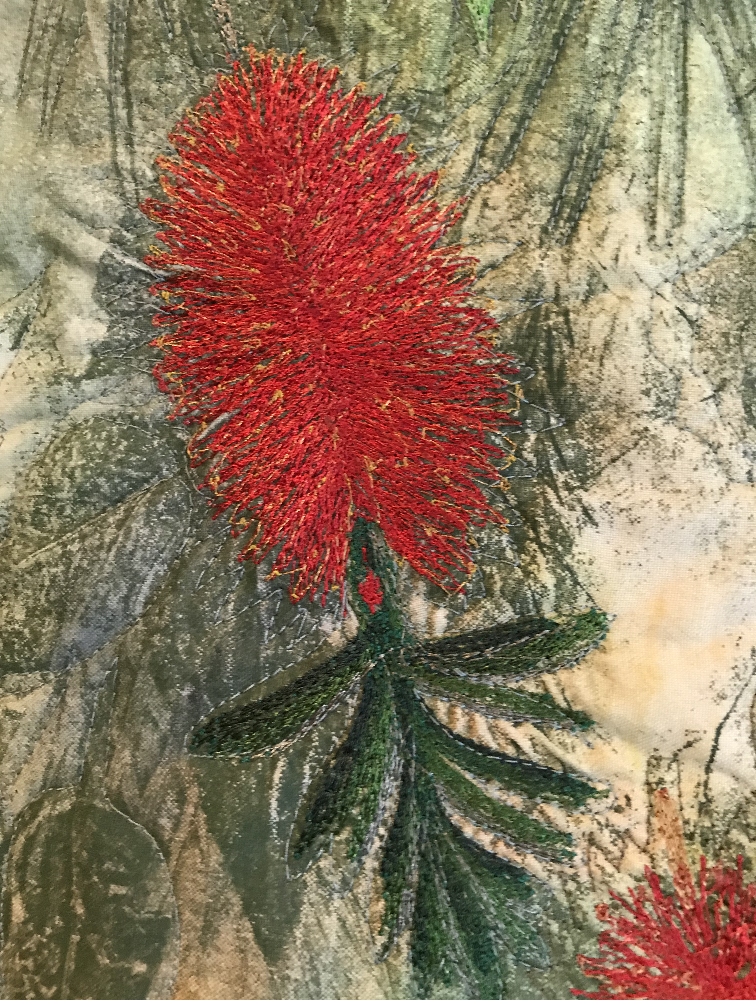
I used sulky threads, about a dozen different colours to get the red to have a bit more life and get more highlights in the green.Once that was done, I took my machine in for a service.
Then, with much relief, I added a border and quilted it with fmq, quilting around the flowers and the leaf shapes in the background. I used rulers to create the arcs around the border and then used fmq to quilt a vine of leaves through the arcs.

I’m happy to say my husband liked it, though he did have way too many helpful suggestions about how I could improve it (add more red…..)
I enjoyed the gel plate. It was a quick and effective technique and a lot of fun. I enjoyed the machine embroidery because of the depth of colour you get, and bottle brush really lend themselves to thread painting.