
Stars for December - Quiltmania bloghop
The theme for this month’s free 12 inch quilt block is stars. I love the geometry of stars. They can be wonky or symmetrical, have 8 points, 4 points, 6 points 5 points etc. Taken to extremes they can turn into a mariner’s compass or a lone star. But more than that, think of going out on a crisp clear night and looking up at the stars with the Milky Way like a cloudy pathway across the sky and each star a pinpoint of light. I think stars put our human concerns and fears into perspective - It’s a lot harder to be worried about trivia when you are gazing at the stars. They give us a peaceful moment, a time to feel both alone and connected, just a tiny part of the vast sweep of space.
So my star block is enjoying the geometry of being a five pointed star set in a circle, with another five points creating a 10 pointed star (all up). It can be set symmetrically or asymmetrically (just rotate the block 90 degrees), and is a lot simpler than it looks.
I’ve made it with foundation paper piecing just for the sake of accuracy of those points, and because it looks great when the circle just picks up each point perfectly.

Five pointed FPP star, foundation pieced

Pieces all cut
Firstly, I cut out my FPP sections and I fold each section along all of its seam lines. I do this because as i add pieces it’s very easy to see that I’ve placed the fabric correctly. When I add a new piece, I fold back the paper FPP template along the seam line that I’m about to sew, and my piece of fabric which I’ve placed right sides together on the previous fabric, exactly matches on to the new folded section. Then I unfold the paper and sew along the seam line. This saves a lot of grief because I can be sure that when I open up the fabric and press the seam, that the new piece I have just sewn on will exactly cover the area it is supposed to cover.
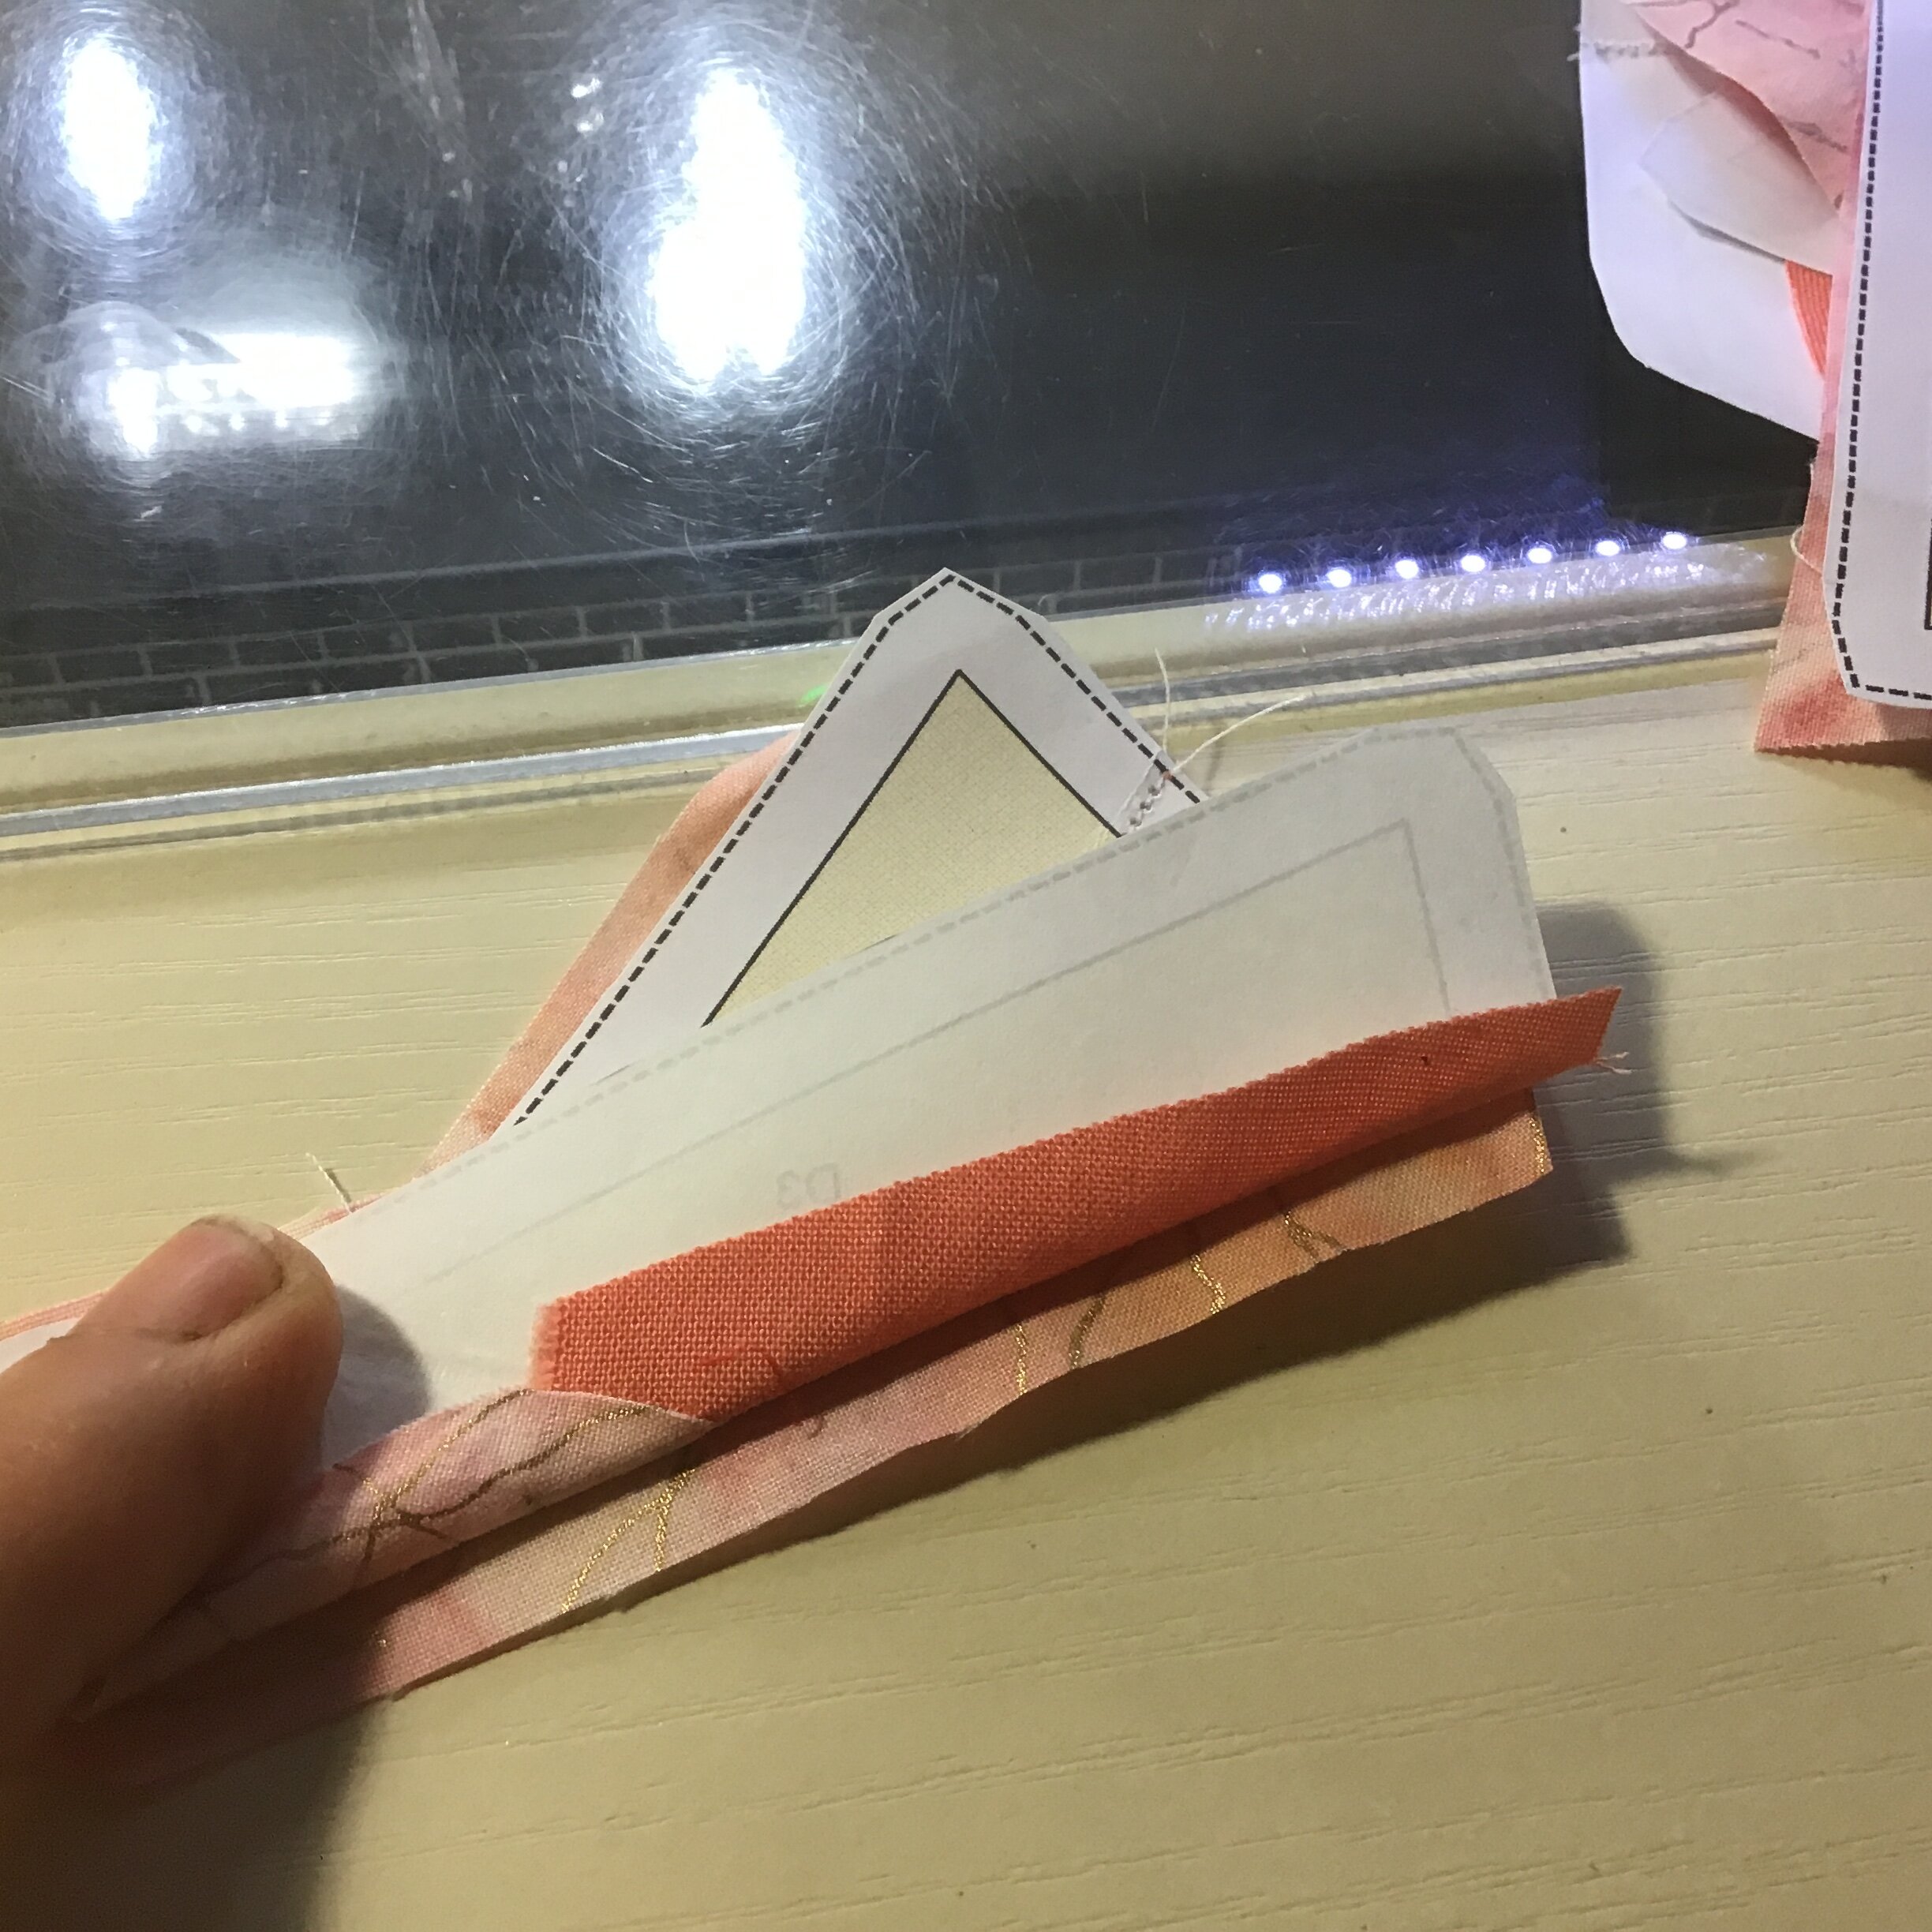
checking placement
I like to use templates to cut my pieces for FPP because I find it easier to place the pieces accurately, and I don’t have to cut back seam allowances as I go. Once the fabric is cut, I pin the first two pieces of each section right sides together on the unprinted side of the paper. I turn the paper over and pin them in place through the paper. Then with the printed side of the paper up, i sew along the stitching line and basically chain piece the first seam in every section. I use a small straight stitch to piece. The small stitch makes it easier to remove the paper later.

pinning each section

piecing each section
Once every section is completed, I check the placement and with the paper still on I use the foundation paper to ensure I’m matching points accurately and getting the seam allowance spot on. As I join sections, I take the paper out of the seam allowance only. This saves having to tweezer little bits out of the seams.

sewing sections together

sewing sections together
Finally, in order to place the circular arcs, I press the star in half, in half again and then on the diagonals, so I’ve got 8 equal spaces around the circle. I finger press each arc in half. Then, I pin the centre of the arc to the diagonal mark, and the ends of each arc to the quarter marks. I then fill in the pins, making sure pins are on the paper side (the star side) and going though the seam line and are perpendicular to the edge. This makes it easy to sew along the curved seam line, removing pins as you come to them. The circular arcs don’t need to be joined into a circle before being sewn on because the circle is exactly 12” in diameter, and so the points where the arcs meet is in the seam allowance.

pinning the curve

pinning the curve

sewing the curve
The next job requires a bin and a good tv show. All the paper needs to be removed, but I find it tears off easily and is not a problem. Some people like to use foundation paper which is washaway or especially thin for easy removal. This is a good plan, but I tend to use computer paper and just make it easy to remove by folding it along the seam lines before I start to sew and by using a small stitch.

Five pointed star block
Here are the links to all the other awesome star patterns for you to enjoy. Happy Quilting!